Saturday, July 19, 2008

Zucchini Is Forever.....


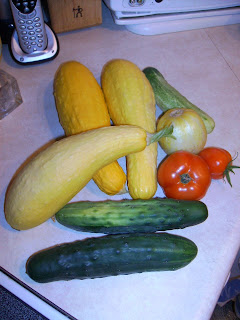
OK, for those of you that plant zucchini, you know that sooner or later, you're going to have to be more creative than you could ever imagine to use it all. I've pickled the stuff to resemble bread & butter pickles, made relish from it, fried it, put it in casseroles, roasted, stir fried, pan fried, steamed it ... and still, more zucchini than I can handle.

Like my summer squash casserole, here's another recipe that I truly enjoy. I can't take credit for it as it was created by my mother ... but I sure make enough of it in the summer months. It's my mom's take on Eggplant Parmesean. My dad has never been too big on eggplant but he sure loves zucchini. And let me tell you ... not another person on the planet has the touch with frying zucchini like my mother. She peddles it around the neighborhood and all her next door friends clamor for the stuff! But sometimes, she'd make this amazing creation that we called "Zucchini Parmesean" ... it has the same components as eggplant parmesean but something about the sweetness and tenderness of the zucchini truly transforms this dish.

It's really easy, can be a lower fat meal, but the only downside is that it's a bit time comsuming to prepare. Because of that, I usually make two of them and cover a second casserole dish to put in the freezer for another time!

Oh, and PS..... if you "lose" a zucchini on a plant and it gets a little too large, these are the best to use for this as they'll get cooked twice and certainly soften up in the oven!

Zucchini Parmesean
  • 2 medium zucchini (about 3 pounds total), sliced in 1/8" discs
  • 2 eggs
  • 4 tblsp of milk
  • 2 cups all purpose flour
  • Lowfat oil for frying (canola works best and is the best for you!)
  • 2 tblsp olive oil
  • 1 28 oz can whole tomatoes (or a good quart of home canned ones)
  • 1 small can of tomato paste
  • 4 cloves garlic, minced
  • 1 1/2 tsp kosher salt
  • 1/2 tsp freshly ground black pepper
  • 1/2 tsp crushed red pepper
  • 2 tblsp minced fresh parsley (or 1 tsp dried)
  • 2 tblsp minced fresh basil (or 1 1/2 tsp dried)
  • Parmesean cheese (the good stuff - a wedge, not the grated plastic container kind!)
  • 8 oz (approx 2 cups) shredded mozzerella cheese (part skim or whole milk)
You can start my making the sauce portion of the dish by putting 2 tablespoons of olive oil in a kettle. As it heats, empty the can (or jar) of tomatoes and can of tomato paste into a blender and puree until smooth. As soon as the oil is hot, put the minced garlic into the pot and stir. Don't let the garlic brown but simply flavor the oil. Add the tomato mixture to the pan, stir and set the heat to a slow simmer. Add the salt, pepper and crushed red pepper and stir. (You might want to add a tablespoon of sugar to counteract the acid in the tomatoes ... some do, some don't ... it's totally up to your taste buds!). If using dried basil and parsley, add those now as well. Let the mixture simmer until it thickens. If you're using fresh herbs, 5 minutes before the sauce is done, add the basil and parsley and stir to blend the flavors. I usually make the tomato sauce while I'm preparing the zucchini slices and "kill two birds with one stone", as it were.....


While the sauce is cooking, prepare the zucchini. Start by heating about 1/4 inch of canola oil in a skillet. Mix the 2 eggs with the 4 tablespoons of milk in a shallow bowl and blend thoroughly. Put the flour into another bowl. Dip each slice of zucchini into the egg mixture and transfer to the flour to coat well. Prepare enough slices to fit into the skillet. When the oil is hot, add the zucchini slices and cook until golden on one side, flip and finish the second side. Depending on how tender the zucchini is, cooking time will vary. As the are finished, layer the fried zucchini slices on a platter or tray lined with paper towels to absorb any additional grease. Repeat until the zucchini slices are completed. You may need additional flour and another egg to complete the process (again, depending on how big the zucchini are).


In a 9 x 13 pan, place a few tablespoons of the tomato sauce on the bottom to keep the zucchini slices from sticking. Start with a layer of fried zucchini slices and grate a fresh layer of parmesean cheese on top. Add some of the shredded mozzerella and then top with about another 1/2 cup of the tomato sauce. It should not be "soupy", just enough to flavor the next layer. Repeat by stacking zucchini, parmesean, mozzerella and sauce until you are finished with the zucchini. Top the casserole with the remaining shredded mozzerella and some more parmesean cheese. Bake for about 35 minutes at 350 degrees until the sauce is bubbling and the cheese layer on top has melted and started to look golden brown.

This is a great vegetarian main dish. And again, there are a lot of elements you can control to make this your own. If you don't like the small bit of heat, omit the crushed red pepper. Adjust spices and salt level to your taste buds. If you feel like a heartier casserole, fry the zucchini slices in egg and breadcrumbs. For a full flavor-full fat version, use whole milk mozzerella (it's my favorite because I like when the cheese stretches and oozes) but you can certainly cut the calories by using already shredded part-skim mozzerella cheese. The only thing I suggest is that when if comes to parmesean, DON'T use a plastic container that sprinkles parmesean. Go the extra mile and get the real deal ... a solid wedge that you have to grate yourself. If you've never used it, you're in for a treat! And I promise, you'll never go back to the ol' plastic jar again. Until next time, as always, ciao!

Thursday, July 17, 2008

Blackberry Jam


There are a few summertime tastes that I can't seem to get enough of.... we've been down the watermelon route and it's a couple of weeks before good blueberries arrive, but it's time for blackberries! Blackberry pie, blackberry cobbler, plain ol' blackberries with milk & sugar, frozen blackberries for later...... but the greatest part of blackberry season is blackberry jam. Now, I know lots of people like jelly, but when you can get actual chunks of delicious fruit mixed in with the jelly part, why would you want anything else?

I made a double batch of blackberry jam the other night and from the looks of it, it turned out perfect! (Being that I haven' tasted any of it yet except for licking the spoon AFTER all my canning was done, I'll have to wait to open the first jar to report the actual result. But if looks are anything, this one's going to be good......)

First off, my friend Yoshie and I went blackberry picking last week. We literally had about 45 minutes before the fruit farm closed and picked wildly and furiously. My overflowing bucket had 6 pounds of the purple beauties and Yoshie had 5 pounds. We both headed home sated with ideas of what we would do with them.

I have to say, blackberry jam is the easiest.... I prefer to use the liquid pectin pouches as I find it more reliable in jelling. But some prefer the older powder method. Whichever you use, I promise, you will find home canning jam as one of the easiest and most delicious ways to preserve summer fruits.

First off, you will need several ingredients BESIDES the jam makings:
  • A water bath canner
  • Pint or half pint jelly jars (sterilized)
  • Lids and rings
  • A ladle
  • A jar lifter
  • A canning funnel
Before you try to make jam, thoroughly clean and sterilize all of your equipment. That means to put a few drops of Clorox into the water while you're cleaning the canner and make sure to thoroughly rinse. Do the same with the jar lifter and canning funnel. Fill the canner about 2/3 full with fresh warm tap water and bring to a boil. Leave the lid on at all times. In a saucepan, boil additional water.


To the canner, add the jars you will use to be making jelly. One batch made 5 pint jars with about a spoonful left over for tasting. Leave the jars in boiling water for at least 10 minutes to sterilize. Remove the jars, drain the water back into the canner, and place jars on a sterile clean cotton towel on your countertop.

Make sure they are completely submerged and leave them there until you are ready to use them. You can use previously used rings but you MUST use new lids so that the rubber seals correctly adhere to the jar. Remove the additional saucepan of boiling water from the heat and add the rings and lids.In the meantime, you can begin to make the jam.

Blackberry Jam
  • 4 cups crushed blackberries (make sure you have chunks of berry pulp, not a smooth puree)
  • 7 cups of sugar
  • 1 pouch of liquid pectin
  • Juice of 1/2 a lemon (optional)
With a potato masher, crush the berries one cup at a time. I like lots of chunky fruit so I don't mash them too extensively.

In a non-reactive kettle, mix the crushed berries, sugar and if you like a bit of tartness, the lemon juice. Bring the mixture to a hard boil. (This means that the mixture continues to boil steadily even while you're stirring.) Add the pouch of liquid pectin very quickly and stir through. Bring the jam back to a rolling boil for EXACTLY one minute. Remove from the heat. Stir thoroughly and remove any foam that may have collected on the top.

Place the canning funnel into the first jar and ladle enough jam to fill the jar to a 1/4 inch of the top. You must leave 1/4 inch of airspace to properly seal the jar. Continue this with the remaining jars. When finished, with a clean and sterile damp cloth, wipe the rims of the jars clean to remove anything that may have spilled on them.

Remove each lid from the saucepan of water (I use cooking tongs instead of a fancy magnetic stick ... they work just as easily and you probably already have them!) and place on top of each jar. Remove the rings in the same fashion and tighten them onto the jar. They only need to be finger tightened and not "forced" on to the jar.

Place all of the jars into the water bath canner with the jar lifter. The water should cover the jars by a good 1 - 2" for correct canning procedure. Replace the lid. Peek every 30 seconds or so to find the point when your water returns to a rolling boil. (With all of that hot jam, it shouldn't take long!) Set your timer for 10 minutes and carefully remove the jars from the water bath and place them on the towel on your countertop. Do NOT touch the jars in any way. You will probably hear a few "pings" or "tink" sounds as each jar creates it's own vacuum seal. This is perfectly normal. But again, DON'T touch the jars, especially lids, for 12 hours so they have a good chance to set. (Make sure they're are in a convenient place so they won't need to be moved!)

In 12 hours, check the seal on the lid by gently pressing on it. If there is no "give" and the lid doesn't pop back up at your finger, it is sealed! These will stay on a pantry shelf for a year or more (if they last that long!). If there happens to be a jar that doesn't seal, refrigerate promptly and use in several weeks.


If you purchase packages of pectin, most boxes have plenty of recipes included for making almost every kind of jam and jelly. If you've never canned before, jam is an easy place to start. It is nutritious, delicious, and packed with pure fruit and sugar and no strange preservatives. With any luck, you'll get hooked like I did and start filling your pantry with anything that grows! Fruit, pickles, tomatoes ... you name it! Here's just a sampling of some things that I put up last season.....


Let me know if you got brave and adventurous and made something wonderful. As always, until next time, ciao!

Saturday, July 12, 2008

Watermelon Cocktail

OK, in my last post, I told you I bought that 35 pound monster melon....? I'm really having to get creative here because I certainly don't want that beauty to go bad.


My biz partner and I have been building sets for our local dinner theatre, "Chaffin's Barn Dinner Theatre" and it's quite an awesome little place. Good food, good entertainment, always a good time! You can visit their web site at http://www.dinnertheatre.com or give the box office a call at 615-646-9977 for reservations or more information. Currently, their production is "The Bops She Bops", an original musical written by Lydia Bushfield. What a great little scenario ... a girl group that graduated from high school in 1962 and their last group memory is a fiasco of a performance at their senior talent show. Their loving father wants to give them one more chance ... so this bumbling group performs at their 10 year reunion, transformed into a beautiful, professional performing group. I have to admit that the director, Martha Wilkinson, did a truly amazing job with this story. It becomes so very believable and you get so wrapped up in the girls lives that you sort of forget it's not a "real" story. Kudos to you, Martha! I was blessed to create all of the musical arrangements for the show and what a treat it was! Such great music from the 60's and 70's ... I honestly can't recommend it enough!

Why am I writing all of this, you may ask? Well here's the deal. As each new show opens on a Thursday night ... there is usually a dress rehearsal on Wednesday evening that is open to fellow performers, friends and family of the current production's performers. This gives them a "trial-run" of where the laughs and the applause are going to be so that the performers get a real audience reaction.

We have a group of friends that have turned this little Wednesday night outing into quite a food fest! My friend Sherri, my roommate Keith, my dear friends Charlynn and Scott and I usually try to make a veritable smorgasbord of culinary choices to bring to the dress rehearsal and eat our dinner while being thoroughly entertained. Of course, there is always a theme cocktail and ... you guessed it ... this one was watermelon!!!

I made an entire gallon of this so if it's for a small gathering, you might want to reduce the ingredients by half. But on a nice hot summer day, I bet you'll go through the entire gallon........

Watermelon Cocktail
  • 1/4 of a large watermelon cubed (approximately 7 cups of chunks)
  • 3 cups of a light wine (white, rose, grenache, etc.)
  • 1/2 cup Vodka (your choice!)
  • Juice of 1 lemon
  • 3/4 cup sugar
  • 1 32 oz bottle of club soda
In a blender, place the seeded chunks of watermelon and about 1 cup of the wine to start a good and quick puree. Strain the watermelon pulp in a fine mesh metal sieve directly into a gallon container to remove just the watermelon juice. You may need to stir the pulp around with a wooden spoon, pressing the juice through the sieve.

To easily mix the sugar, add the sugar and remaining wine to the blender along with the juice of the lemon and mix. Pour that through the metal sieve to remove any "chunks" of pulp that may occur. Mix in the 1/2 cup of vodka. You should have about 3/4 of a gallon (12 cups) of the watermelon cocktail. If not, add enough wine to make that amount. Put this in the refrigerator to chill.

When ready to serve, stir in the bottle of club soda and pour over ice in tall glasses. Believe me, that gallon will disappear faster than you know.....


As always, until next time, ciao!

Wonderful Watermelon

My grandpap always used to say that watermelon wasn't good until the 4th of July. After years of gardening myself, I think he was so very right. My grandfather moved from Italy as a small boy after his mother died with his father to Venezuela. He was a sheep herder before emigrating to the United States and raising a family of 7 children. Though he had no formal education, he was one of the smartest men I can remember. He passed away when I was about 5 but obviously left an important legacy to me ... that the only ingredients were fresh ingredients. It's amazing what you can pick up from people and what they impress you with even as a 5 year old! If you could see that man's vegetables and gardens, you'd understand what I meant. He lived in the coal mining hills of Pennsylvania, not so far from West Virginia. In the 5 room company house duplex, they were lucky to have running water ... cold water, mind you. (That makes me think bath time was really no fun!) So when it was time to water the garden, the oldest kids put a pole across their back, took 2 metal buckets (one hanging on each side) down to the river to fill up. This is how the garden got watered every other day ... unless, of course, they were blessed with a good solid rain. And To feed a family of 9, trust me ... he had oodles of tomato, pepper, cucumber and musk melon plants. This was the food they had to put up for the winter to eat. What a great man, And what a great legacy to leave us all! I think my 3 dozen tomato plants are outrageous to take care of with my soaker hoses and mulch so that all I have to do is turn on my outdoor faucet, come back into my air conditioned home and an hour later, shut it off. Imagine caring for 10 or 12 dozen tomato and 10 or 12 dozen pepper plants the way he did! What a man.....


I have a stray sugar baby watermelon that grew into my cantaloupe patch this year. Last summer, the heat was so intense that my sugar babies seemed to "boil" from the 106 degree temperatures and rot right there in the patch. So I decided to plant heartier cantaloupe this year that might not feel the heat so badly. I guess God destined me to have some watermelon this season as one stray vine emerged from the dirt and I just had to let it go!

Although I didn't use my sugar babies for this as they are nowhere near ready (only yellow blossoms as of this post), I did purchase a deee-licious oblong watermelon (called a Sangria, I believe....) from our farmers market. It was there for the testing and was so juice, sweet and red that I had to buy the 35 pound monster!

Which leads me to the next couple of posts....... how to use the monster watermelon! I have to say that I am pretty brave when it comes to trying to mix flavors and such so it's not unusual for me to mix savory and sweet. I tried this salad out on my friends on a lovely boat cruise last night and we all agreed it was pretty amazing!

Watermelon Salad
  • 3 cups of cubed watermelon, seeded and cut into 3/4 inch dice
  • 1 cup of cherry tomatoes cut in half
  • 1 medium cucumber, cut into small dice
  • 1/4 medium onion, finely diced
  • 10 basil leaves, cut into chiffonade (ribbons)
  • 1/2 cup of vegetable oil
  • Splash of white wine (or other white) vinegar
  • Juice of 1 lemon
  • 1 tsp kosher salt
  • 1/2 tsp freshly cracked black pepper
  • 1 medium clove of garlic
  • 5 tblsp sugar
  • 1/4 tsp dry ground mustard
In a medium bowl, combine the watermelon, tomatoes, cucumber and onion. Chiffonade the basil by stacking all 10 leaves on top of each other in the same direction, roll the leaves to make a basil "cigar" and slice crosswise on the leaves thinly, about 1/16". Now, if you're knife skills are not that good ... don't stress! Thicker slices of basil leaves will NOT ruin the salad! Add that to the veggies and watermelon and mix to combine.

I am so lucky that my roommate has a "Magic Bullet" as I truly believe it to be one of the best inventions of the 21st Century! It's like a blender X 10!!! So if you don't have one, no need to spend $59 to get the set-up, just use your blender as the dressing for this needs to be smooth and silky with no chunks of garlic.

To easily juice the lemon, place it in a microwave for 10 seconds or roll with a decent pressure on your countertop. When you cut it open, it should be much easier to juice and will give up lots more from it's cells than if you just try to squeeze it. Squeeze the lemon juice into the blender and add the rest of the ingredients to the blender and blend until smooth. Pour the dressing over the salad ... you may not need the entire amount of dressing you made depending on how juicy your watermelon and veggies were..... save the remainder for a salad or as a dressing on grilled chicken..... YUM!

Mix the dressing thoroughly into the salad and put the salad in the refrigerator for a couple of hours to serve good and cold!


I happened to have some fresh blackberries that I used as a garnish and the sweet tart explosion of blackberry was a great addition to the salad. You could use strawberries or fresh blueberries too .... almost anything!

Now get out there and try something crazy and fun like this. If you can change the recipe for fresh things you may have, let me know about it! And as always, until next time, ciao!

Quick And Easy Summer Salad

When the veggies start rolling in from the garden and I have no more leafy greens because the temperatures are much too hot for lettuces, this is a staple in my salad repertoire. I can't take credit for this ... my mom, aunts & uncles and so forth have been doing this fresh from their gardens for many, many years!


Tomato, Cucumber and Pepper Salad
  • 2 large, ripe tomatoes cut into chunks
  • 1 large cucumber, cut into chunks
  • 1 large green pepper, cut into chunks
  • 1/4 medium onion, diced very small
  • 1 clove garlic minced
  • 1/2 cup of a flavorful extra vigin olive oil
  • 1/3 cup vinegar (balsamic, white, apple cider ... any will do)
  • 1 tsp kosher salt
  • 1/2 tsp freshly cracked black pepper
  • 1 tblsp sugar (or more, to taste)
  • 1/4 tsp dried ground mustard
  • Fresh basil
  • Fresh parsley
Mix all of the vegetable ingredients in a bowl. You can add as much fresh parsley and basil as you would like to suit your tastes. I always cut up about one sprig of parsley (maybe 10 leaves) and about 5 large basil leaves. Toss to mix.

In a small bowl, add the oil, vinegar, salt, pepper, sugar and mustard. Whisk until well combined. I find that if I use balsamic vinegar (as it is already sweet) I can cut down on the sugar. Apple cider vinegar turns out JUST right and if I use a white vinegar, I need to add a pinch more sugar as the acid content is higher.

Pour the dressing over the veggies and mix well. I find that if I make this a couple of hours before dinner and put it in the refrigerator to get good and cold, it tastes even better and the flavors meld beautifully.


You can also add chunks of fresh zucchini, yellow squash or for that matter, any other fresh vegetable. I use these because it's a total comfort food to me and every time I eat it, floods of fond memories of childhood summers, aunts, uncles, cousins and grandparents come flooding into my mind. Food can do that to you!

Let me know if you come up with any other awesome mixes and creations for this salad and as always, until next time, ciao!

Yellow Squash Is In!!!


OK, summer's bounty is about to hit and I went to the garden on July 4 after some good and heavy rains. I had a great surprise as more than a handful of veggies that weren't there 2 days prior emerged triumphantly from the plants!

As I've posted previously, yellow squash and zucchini are two of my favorites ... seems I never get sick of them and always experiment and find new ways to do things with them......

I had a few beautiful yellow squash and decided to "get crazy" and try something totally off the wall. I love the flavors of Thai food and I thought the zingy flavor of a a yellow squash might work really well with those spices. So here's what I created!

Thai Style Summer Squash
  • 1 medium onion, cut in half and sliced into long strips
  • 3 small to medium yellow squash, sliced into 1/8 inch slices
  • 2 tblsp canola or vegetable oil
  • 3 tblsp soy sauce
  • 1 tblasp tahini paste
  • 2 tblsp creamy peanut butter
  • 1 small red chile pepper (or 1/2 tsp crushed red pepper)
  • 1 lime
  • 1/2 tsp salt
  • 1/2 tsp cracked black pepper
  • Fresh basil leaves
In a hot skillet, add the oil. (You'll notice that I usually use olive oil but for this, I think the flavor is too strong ... so a more mild flavored oil is in order! ) Add the onions and stir quickly to wilt. Keep them moving so the don't brown. As soon as they start to soften, add the sliced yellow squash and continue to stir and move it around. Reduce the heat to medium or medium-low. Add the salt and pepper and cook them until you start to see them get a bit wilted.

In a small bowl, juice the lime. (10 seconds in the microwave or rolling on the counter with a bit of pressure will loosen the juices inside). Add the peanut butter, tahini paste, soy sauce and minced chili or pepper flakes and stir to make a sauce.

Add this sauce to the skillet and let it cook into the squash for maybe an additional 5 minutes. At the last minute, tear approximately 10 medium basil leaves into the sjillet and stir quickly to incorporate. If the mixture looks too thick, add a bit of water at a time to create a more glossy sauce.

Serve over white rice or eat plain, as-is, for a great side dish!


I suppose you could do this with almost any fresh vegetable by adjusting the cooking times, etc. It would be awesome with fresh asian greens such as a bok choy or napa cabbage. Let me know what you create with this ... and as always, until next time, ciao!

I Needed A Quick Version Of Some Hearty Food!

As this particular blog entry was supposed to happen sometime in June AND I have four other entries stacked up, I thought I should take advantage of a (finally) lazy Saturday and get some of these things up! I spent a wonderful evening last night with my friends Julie, Robb and Paula and I was scolded from Julie for not having posted ... so Jules, this is for YOU!!!


I tend to be someone who just cooks from my pantry and freezer (and as soon as the garden bounty starts, you'll see that most of it starts there!) so I was looking around for ingredients to make a nice hearty stew or gumbo ... you know, something with stick-to-your-ribs kind of quality. As I rummaged, I found one link of Spanish chorizo sausage and some frozen shrimp. I also had some fresh green peppers and I thought to myself....., "hmmm, I could do something with this!" And so I did ... I created a sort of mock gumbo, of course without the traditional spices and the roux. So my version happens to be a lot more heart healthy and less calories than some of the originals. But I don't know if I should be calling it a "gumbo" because the the main ingredients are different. So I'm thinking we'll call it a skillet stew ... how does that sound to everyone? Well, whatever we call if, it turned out to be a yummy dinner no matter what! So here's what I created.....

Shrimp Skillet Stew
  • 1 medium onion, diced
  • 1 large green pepper, diced
  • 2 ribs of celery, diced
  • 2 tblsp extra virgin olive oil
  • 1 6 to 8 ounce Chorizo sausage, cut into about 20 round slices
  • 18 to 24 large fresh or frozen shrimp
  • 1 14.5 ounce can of diced tomatoes
  • 1 tsp salt
  • 1/2 tsp freshly cracked black pepper
  • 1 bay leaf
  • 1/4 tsp crushed red pepper
  • Several sprigs of fresh parsley, to stir in the last 5 minutes and for garnish
  • 2 cups of uncooked long grain white rice
  • 4 cups of water
Put 4 cups of water into a saucepan with a tight fitting lid. Bring the water to a boil for the rice. While you're waiting, start the next part of the skillet stew.

To a hot skillet, add the 2 tblsp of extra virgin olive oil (please don't measure, 2 turns around the pan will do!) and then add the diced onion, peppers and celery. Turn the temperature to a medium heat and sweat the vegetables until softened. (That means to cook long enough to extract some of their juices, soften the diced veggies but NOT to let them brown.) Add the chorizo slices and cook them through.

At this point, the 4 cups of water is probably boiling. Add the 2 cups of rice. Stirring the rice, bring the rice back to a full boil and immediately turn the heat to the lowest possible setting. Once the rice stops bubbling, put the lid on and let it cook over that very lowest setting for 20 minutes. Don't TOUCH it! don't remove the lid to check on it ... don't stir it. In fact, set your timer for 20 minutes and IGNORE the rice! When the timer goes off, you'll have perfect white rice every time!

Once you get that going and the rice is cooking for 20 minutes, add your can of diced tomatoes along with the bay leaf and spices to the skillet. This should be enough time for the stew to cook down until the rice is finished.

When the rice timer goes off, remove the rice from the heat, use a fork to "fluff" the rice gently and then put the lid back on until you complete the stew.

Add the shrimp to the skillet mixture and cook them through until they are just pink..... don't over cook your shrimp or you'll have rubber hockey pucks. They literally need about 5 minutes to cook through (even the frozen ones!). At this point, you can add some fresh parsley (maybe 2 tblsp chopped fresh ... if you don't have that, add 1 tblsp dried).

I like to serve things like this family style ... spread the rice on a platter and pour the stew over it in the middle. garnish with a few fresh parsley springs and dinner is on, generously for four people!

Now here's the ticket ... if you don't have chorizo, you can use sweet or hot Italian sausage, sweet or hot hungarian sausage .... experiment and make the recipe your own. Don't like peppers, leave them out! Manipulate this ti your liking and claim it as your own ... cooking can be as personal as you want to make it!

As always, until next time, ciao!